

General Management
Introduction
Section titled “Introduction”Validator performance is pivotal in maintaining the security and stability of the Polkadot network. As a validator, optimizing your setup ensures efficient transaction processing, minimizes latency, and maintains system reliability during high-demand periods. Proper configuration and proactive monitoring also help mitigate risks like slashing and service interruptions.
This guide covers essential practices for managing a validator, including performance tuning techniques, security hardening, and tools for real-time monitoring. Whether you're fine-tuning CPU settings, configuring NUMA balancing, or setting up a robust alert system, these steps will help you build a resilient and efficient validator operation.
Configuration Optimization
Section titled “Configuration Optimization”For those seeking to optimize their validator's performance, the following configurations can improve responsiveness, reduce latency, and ensure consistent performance during high-demand periods.
Deactivate Simultaneous Multithreading
Section titled “Deactivate Simultaneous Multithreading”Polkadot validators operate primarily in single-threaded mode for critical tasks, so optimizing single-core CPU performance can reduce latency and improve stability. Deactivating simultaneous multithreading (SMT) can prevent virtual cores from affecting performance. SMT is called Hyper-Threading on Intel and 2-way SMT on AMD Zen.
Take the following steps to deactivate every other (vCPU) core:
-
Loop though all the CPU cores and deactivate the virtual cores associated with them:
Terminal window for cpunum in $(cat /sys/devices/system/cpu/cpu*/topology/thread_siblings_list | \cut -s -d, -f2- | tr ',' '\n' | sort -un)doecho 0 > /sys/devices/system/cpu/cpu$cpunum/onlinedone -
To permanently save the changes, add
nosmt=forceto theGRUB_CMDLINE_LINUX_DEFAULTvariable in/etc/default/grub:Terminal window sudo nano /etc/default/grub# Add to GRUB_CMDLINE_LINUX_DEFAULT-8<-- 'code/node-infrastructure/run-a-validator/operational-tasks/general-management/grub-config-01.js:1:7' -
Update GRUB to apply changes:
Terminal window sudo update-grub -
After the reboot, you should see that half of the cores are offline. To confirm, run:
Terminal window lscpu --extended
Deactivate Automatic NUMA Balancing
Section titled “Deactivate Automatic NUMA Balancing”Deactivating NUMA (Non-Uniform Memory Access) balancing for multi-CPU setups helps keep processes on the same CPU node, minimizing latency.
Follow these stpes:
-
Deactivate NUMA balancing in runtime:
Terminal window sysctl kernel.numa_balancing=0 -
Deactivate NUMA balancing permanently by adding
numa_balancing=disableto the GRUB settings:Terminal window sudo nano /etc/default/grub# Add to GRUB_CMDLINE_LINUX_DEFAULT-8<-- 'code/node-infrastructure/run-a-validator/operational-tasks/general-management/grub-config-01.js:9:15' -
Update GRUB to apply changes:
Terminal window sudo update-grub -
Confirm the deactivation:
Terminal window sysctl -a | grep 'kernel.numa_balancing'
If you successfully deactivated NUMA balancing, the preceding command should return 0.
Spectre and Meltdown Mitigations
Section titled “Spectre and Meltdown Mitigations”Spectre and Meltdown are well-known CPU vulnerabilities that exploit speculative execution to access sensitive data. These vulnerabilities have been patched in recent Linux kernels, but the mitigations can slightly impact performance, especially in high-throughput or containerized environments.
If your security requirements allow it, you can deactivate specific mitigations, such as Spectre V2 and Speculative Store Bypass Disable (SSBD), to improve performance.
To selectively deactivate the Spectre mitigations, take these steps:
-
Update the
GRUB_CMDLINE_LINUX_DEFAULTvariable in your/etc/default/grubconfiguration:Terminal window sudo nano /etc/default/grub# Add to GRUB_CMDLINE_LINUX_DEFAULT-8<-- 'code/node-infrastructure/run-a-validator/operational-tasks/general-management/grub-config-01.js:17:23' -
Update GRUB to apply changes and then reboot:
Terminal window sudo update-grubsudo reboot
This approach selectively deactivates the Spectre V2 and Spectre V4 mitigations, leaving other protections intact. For full security, keep mitigations activated unless there's a significant performance need, as disabling them could expose the system to potential attacks on affected CPUs.
Monitor Your Node
Section titled “Monitor Your Node”Monitoring your node's performance is critical for network reliability and security. Tools like the following provide valuable insights:
- Prometheus: An open-source monitoring toolkit for collecting and querying time-series data.
- Grafana: A visualization tool for real-time metrics, providing interactive dashboards.
- Alertmanager: A tool for managing and routing alerts based on Prometheus data.
This section covers setting up these tools and configuring alerts to notify you of potential issues.
Environment Setup
Section titled “Environment Setup”Before installing Prometheus, ensure the environment is set up securely by running Prometheus with restricted user privileges.
Follow these steps:
-
Create a Prometheus user to ensure Prometheus runs with minimal permissions:
Terminal window sudo useradd --no-create-home --shell /usr/sbin/nologin prometheus -
Create directories for configuration and data storage:
Terminal window sudo mkdir /etc/prometheussudo mkdir /var/lib/prometheus -
Change directory ownership to ensure Prometheus has access:
Terminal window sudo chown -R prometheus:prometheus /etc/prometheussudo chown -R prometheus:prometheus /var/lib/prometheus
Install and Configure Prometheus
Section titled “Install and Configure Prometheus”After setting up the environment, install and configure the latest version of Prometheus as follows:
-
Download Prometheus for your system architecture from the releases page. Replace
INSERT_RELEASE_DOWNLOADwith the release binary URL (e.g.,https://github.com/prometheus/prometheus/releases/download/v3.0.0/prometheus-3.0.0.linux-amd64.tar.gz):Terminal window sudo apt-get update && sudo apt-get upgradewget INSERT_RELEASE_DOWNLOAD_LINKtar xfz prometheus-*.tar.gzcd prometheus-3.0.0.linux-amd64 -
Set up Prometheus:
-
Copy binaries:
Terminal window sudo cp ./prometheus /usr/local/bin/sudo cp ./promtool /usr/local/bin/sudo cp ./prometheus /usr/local/bin/ -
Copy directories and assign ownership of these files to the
prometheususer:Terminal window sudo cp -r ./consoles /etc/prometheussudo cp -r ./console_libraries /etc/prometheussudo chown -R prometheus:prometheus /etc/prometheus/consolessudo chown -R prometheus:prometheus /etc/prometheus/console_libraries -
Clean up the download directory:
Terminal window cd .. && rm -r prometheus*
-
-
Create
prometheus.ymlto define global settings, rule files, and scrape targets:Terminal window sudo nano /etc/prometheus/prometheus.ymlglobal:scrape_interval: 15sevaluation_interval: 15srule_files:# - "first.rules"# - "second.rules"scrape_configs:- job_name: 'prometheus'scrape_interval: 5sstatic_configs:- targets: ['localhost:9090']- job_name: 'substrate_node'scrape_interval: 5sstatic_configs:- targets: ['localhost:9615']Prometheus is scraped every 5 seconds in this example configuration file, ensuring detailed internal metrics. Node metrics with customizable intervals are scraped from port
9615by default. -
Verify the configuration with
promtool, an open source monitoring tool:Terminal window promtool check config /etc/prometheus/prometheus.yml -
Save the configuration and change the ownership of the file to
prometheususer:Terminal window sudo chown prometheus:prometheus /etc/prometheus/prometheus.yml
Start Prometheus
Section titled “Start Prometheus”-
Launch Prometheus with the appropriate configuration file, storage location, and necessary web resources, running it with restricted privileges for security:
Terminal window sudo -u prometheus /usr/local/bin/prometheus --config.file /etc/prometheus/prometheus.yml \--storage.tsdb.path /var/lib/prometheus/ \--web.console.templates=/etc/prometheus/consoles \--web.console.libraries=/etc/prometheus/console_librariesIf you set the server up properly, you should see terminal output similar to the following:
-8<-- 'code/node-infrastructure/run-a-validator/operational-tasks/general-management/terminal-output-01.html'
-
Verify you can access the Prometheus interface by navigating to:
http://SERVER_IP_ADDRESS:9090/graphIf the interface appears to work as expected, exit the process using
Control + C. -
Create a systemd service file to ensure Prometheus starts on boot:
Terminal window sudo nano /etc/systemd/system/prometheus.serviceTerminal window [Unit]Description=Prometheus MonitoringWants=network-online.targetAfter=network-online.target[Service]User=prometheusGroup=prometheusType=simpleExecStart=/usr/local/bin/prometheus \--config.file /etc/prometheus/prometheus.yml \--storage.tsdb.path /var/lib/prometheus/ \--web.console.templates=/etc/prometheus/consoles \--web.console.libraries=/etc/prometheus/console_librariesExecReload=/bin/kill -HUP $MAINPID[Install]WantedBy=multi-user.target -
Reload systemd and enable the service to start on boot:
Terminal window sudo systemctl daemon-reload && sudo systemctl enable prometheus && sudo systemctl start prometheus -
Verify the service is running by visiting the Prometheus interface again at:
http://SERVER_IP_ADDRESS:9090/
Install and Configure Grafana
Section titled “Install and Configure Grafana”This guide follows Grafana's canonical installation instructions.
To install and configure Grafana, follow these steps:
-
Install Grafana prerequisites:
Terminal window sudo apt-get install -y apt-transport-https software-properties-common wget -
Import the GPG key:
Terminal window sudo mkdir -p /etc/apt/keyrings/wget -q -O - https://apt.grafana.com/gpg.key | gpg --dearmor | sudo tee /etc/apt/keyrings/grafana.gpg > /dev/null -
Configure the stable release repo and update packages:
Terminal window echo "deb [signed-by=/etc/apt/keyrings/grafana.gpg] https://apt.grafana.com stable main" | sudo tee -a /etc/apt/sources.list.d/grafana.listsudo apt-get update -
Install the latest stable version of Grafana:
Terminal window sudo apt-get install grafana
To configure Grafana, take these steps:
-
Configure Grafana to start automatically on boot and start the service:
Terminal window sudo systemctl daemon-reloadsudo systemctl enable grafana-server.servicesudo systemctl start grafana-server -
Check if Grafana is running:
Terminal window sudo systemctl status grafana-serverIf necessary, you can stop or restart the service with the following commands:
Terminal window sudo systemctl stop grafana-serversudo systemctl restart grafana-server -
Access Grafana by navigating to the following URL and logging in with the default username and password (
admin):http://SERVER_IP_ADDRESS:3000/login
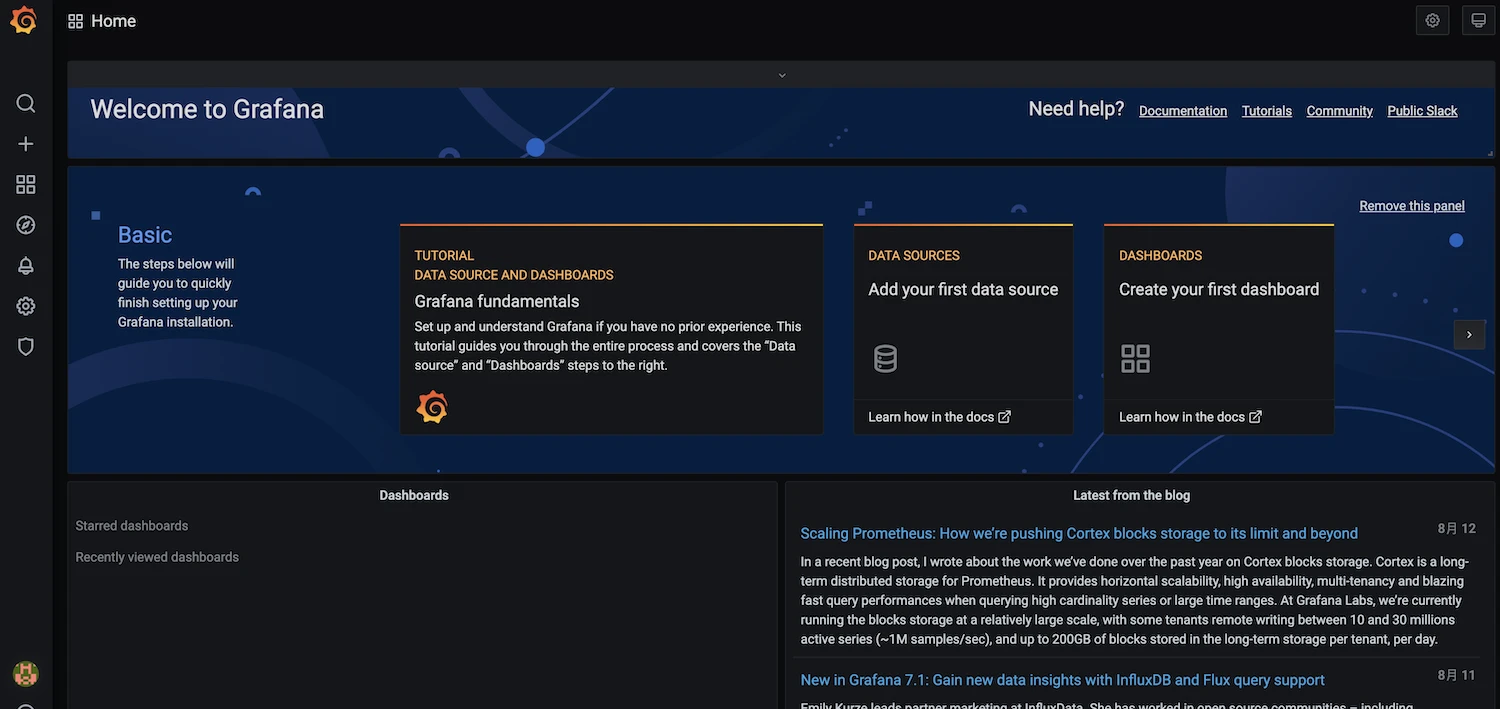
To visualize node metrics, follow these steps:
-
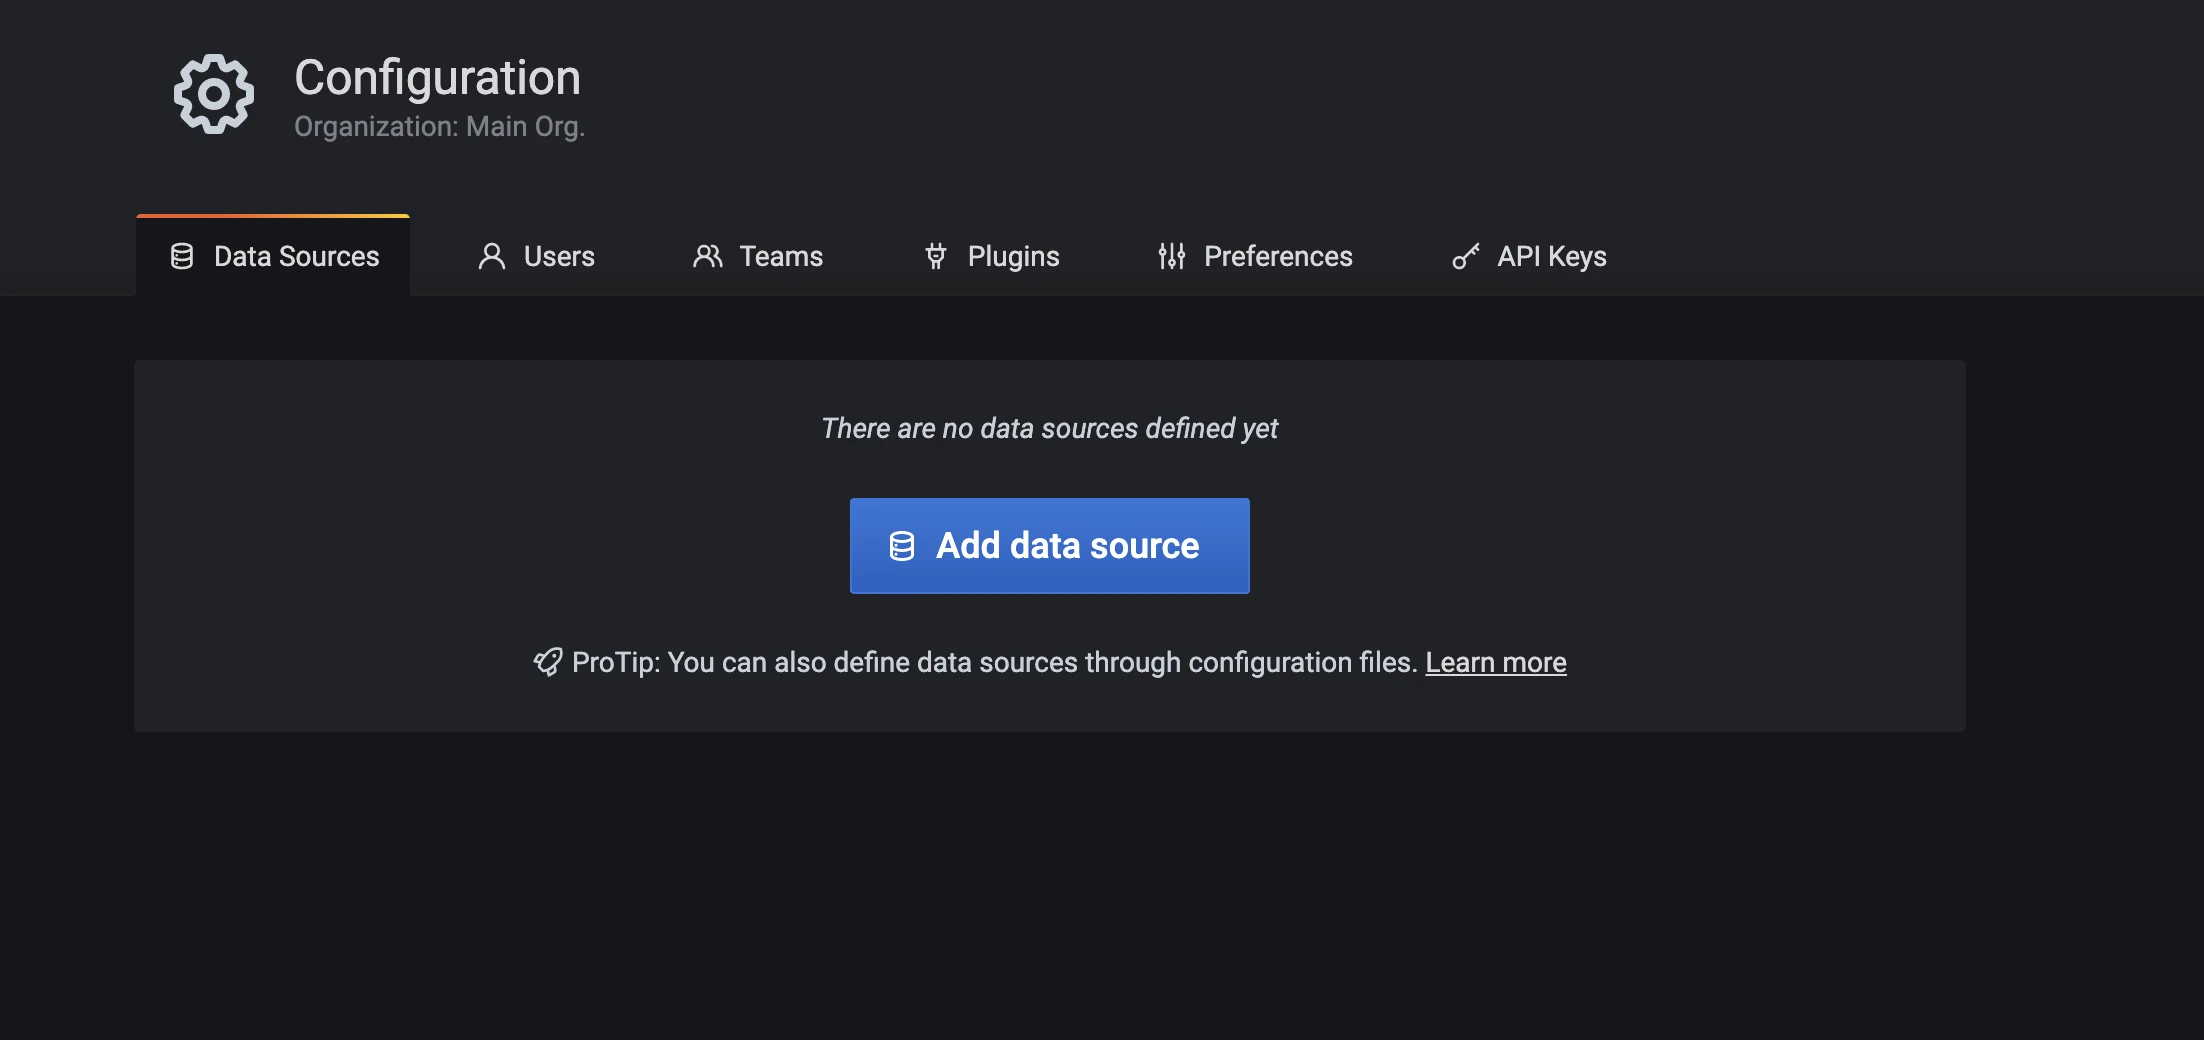
Select the gear icon to access Data Sources settings.
-
Select Add data source to define the data source.
-
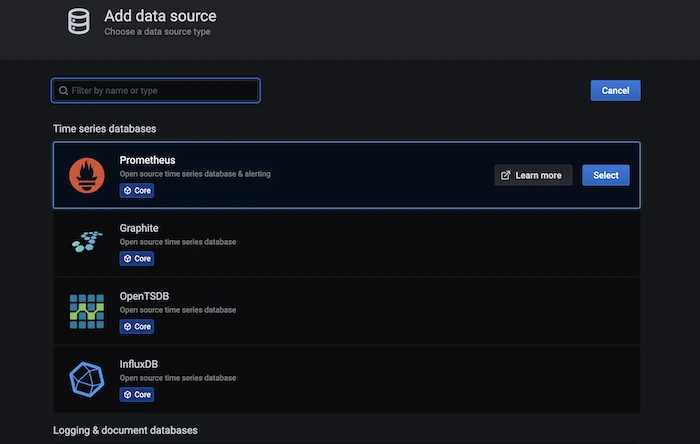
Select Prometheus.
-
Enter
http://localhost:9090in the URL field and click Save & Test. If "Data source is working" appears, your connection is configured correctly.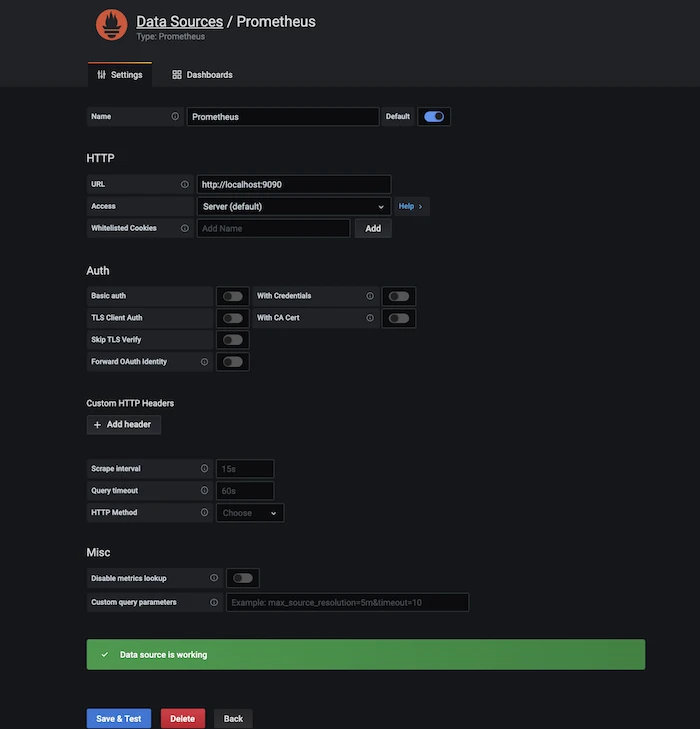
-
Select Import from the left menu, choose Prometheus from the dropdown, and click Import.
-
Start your Polkadot node by running
./polkadot. You should now be able to monitor node performance, block height, network traffic, and tasks tasks on the Grafana dashboard.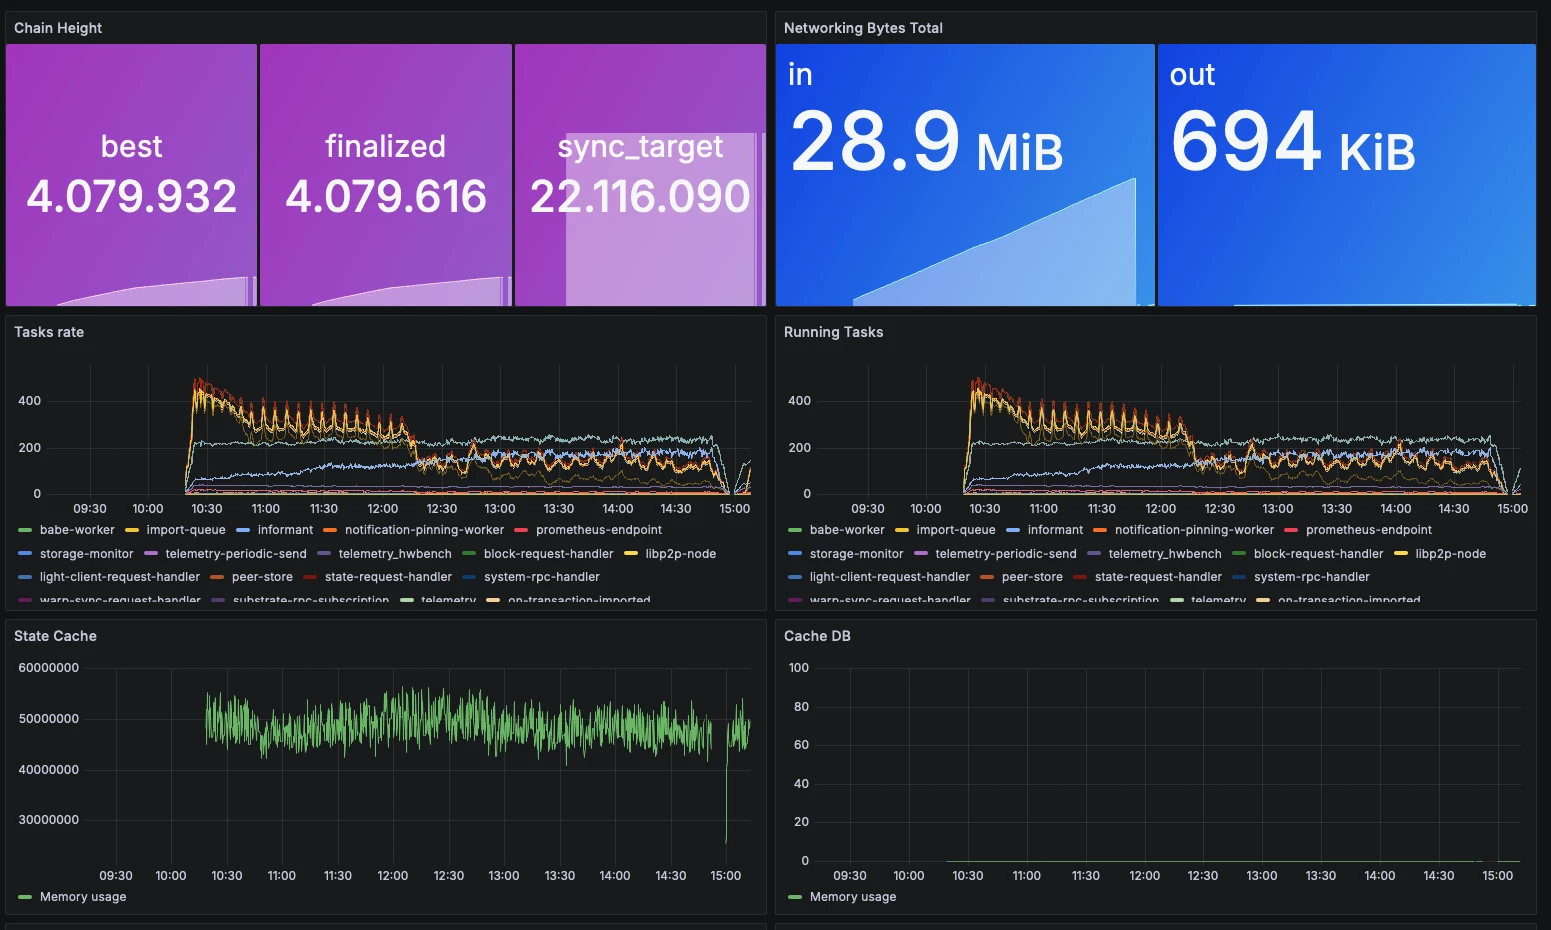
The Grafana dashboards page features user created dashboards made available for public use. For an example, see the Substrate Node Metrics dashboard.
Install and Configure Alertmanager
Section titled “Install and Configure Alertmanager”Alertmanager is an optional component that complements Prometheus by managing alerts and notifying users about potential issues.
Follow these steps to install and configure Alertmanager:
-
Download Alertmanager for your system architecture from the releases page. Replace
INSERT_RELEASE_DOWNLOADwith the release binary URL (e.g.,https://github.com/prometheus/alertmanager/releases/download/v0.28.0-rc.0/alertmanager-0.28.0-rc.0.linux-amd64.tar.gz):Terminal window wget INSERT_RELEASE_DOWNLOAD_LINKtar -xvzf alertmanager* -
Copy the binaries to the system directory and set permissions:
Terminal window cd alertmanager-0.28.0-rc.0.linux-amd64sudo cp ./alertmanager /usr/local/bin/sudo cp ./amtool /usr/local/bin/sudo chown prometheus:prometheus /usr/local/bin/alertmanagersudo chown prometheus:prometheus /usr/local/bin/amtool -
Create the
alertmanager.ymlconfiguration file under/etc/alertmanager:Terminal window sudo mkdir /etc/alertmanagersudo nano /etc/alertmanager/alertmanager.ymlGenerate an app password in your Google account to enable email notifications from Alertmanager. Then, add the following code to the configuration file to define email notifications using your email and app password:
-8<-- 'code/node-infrastructure/run-a-validator/operational-tasks/general-management/alertmanager.yml'Terminal window sudo chown -R prometheus:prometheus /etc/alertmanager -
Configure Alertmanager as a service by creating a systemd service file:
Terminal window sudo nano /etc/systemd/system/alertmanager.service-8<-- 'code/node-infrastructure/run-a-validator/operational-tasks/general-management/systemd-alert-config.md' -
Reload and enable the service:
Terminal window sudo systemctl daemon-reloadsudo systemctl enable alertmanagersudo systemctl start alertmanager -
Verify the service status:
Terminal window sudo systemctl status alertmanagerIf you have configured Alertmanager properly, the Active field should display active (running) similar to below:
-8<-- 'code/node-infrastructure/run-a-validator/operational-tasks/general-management/alertmanager-status.html'
Grafana Plugin
Section titled “Grafana Plugin”There is an Alertmanager plugin in Grafana that can help you monitor alert information.
Follow these steps to use the plugin:
-
Install the plugin:
Terminal window sudo grafana-cli plugins install camptocamp-prometheus-alertmanager-datasource -
Restart Grafana:
Terminal window sudo systemctl restart grafana-server -
Configure Alertmanager as a data source in your Grafana dashboard (
SERVER_IP:3000):- Go to Configuration > Data Sources and search for Prometheus Alertmanager.
- Enter the server URL and port for the Alertmanager service, and select Save & Test to verify the connection.
-
Import the 8010 dashboard for Alertmanager, selecting Prometheus Alertmanager in the last column, then select Import.
Integrate Alertmanager
Section titled “Integrate Alertmanager”Complete the integration by following these steps to enable communication between Prometheus and Alertmanager and configure detection and alert rules:
-
Update the
etc/prometheus/prometheus.ymlconfiguration file to include the following code:rule_files:- 'rules.yml'alerting:alertmanagers:- static_configs:- targets:- localhost:9093Expand the following item to view the complete
prometheus.ymlfile.prometheus.yml
global:scrape_interval: 15sevaluation_interval: 15srule_files:- 'rules.yml'alerting:alertmanagers:- static_configs:- targets:- localhost:9093scrape_configs:- job_name: 'prometheus'scrape_interval: 5sstatic_configs:- targets: ['localhost:9090']- job_name: 'substrate_node'scrape_interval: 5sstatic_configs:- targets: ['localhost:9615'] -
Create the rules file for detection and alerts:
Terminal window sudo nano /etc/prometheus/rules.ymlAdd a sample rule to trigger email notifications for node downtime over five minutes:
-8<-- 'code/node-infrastructure/run-a-validator/operational-tasks/general-management/instance-down.yml'If any of the conditions defined in the rules file are met, an alert will be triggered. For more on alert rules, refer to Alerting Rules and additional alerts.
-
Update the file ownership to
prometheus:Terminal window sudo chown prometheus:prometheus rules.yml -
Validate the rules syntax:
Terminal window sudo -u prometheus promtool check rules rules.yml -
Restart Prometheus and Alertmanager:
Terminal window sudo systemctl restart prometheus && sudo systemctl restart alertmanager
Now you will receive an email alert if one of your rule triggering conditions is met.
Secure Your Validator
Section titled “Secure Your Validator”Validators in Polkadot's Proof of Stake (PoS) network play a critical role in maintaining network integrity and security by keeping the network in consensus and verifying state transitions. To ensure optimal performance and minimize risks, validators must adhere to strict guidelines around security and reliable operations.
Key Management
Section titled “Key Management”Though they don't transfer funds, session keys are essential for validators as they sign messages related to consensus and parachains. Securing session keys is crucial as allowing them to be exploited or used across multiple nodes can lead to a loss of staked funds via slashing.
Given the current limitations in high-availability setups and the risks associated with double-signing, it’s recommended to run only a single validator instance. Keys should be securely managed, and processes automated to minimize human error.
There are three approaches for managing session keys:
-
Set session keys via Polkadot Hub (Recommended): Use the
stakingRcClient.set_keysextrinsic on Polkadot Hub to send session keys and the ownership proof to the relay chain via XCM. This is the recommended approach for all validator setups and is required for validators using pure proxy stash accounts or Staking Operator proxies. Setting session keys on Polkadot Hub requires a deposit of approximately 60 DOT (or ~2 KSM on Kusama). This deposit is only released whenstakingRcClient.purge_keysis called on Polkadot Hub — purging keys via the relay chain does not release the deposit. -
Generate and store in node: Using the
author.rotateKeysWithOwnerRPC call (available from runtime 2.2.0), which takes your stash account ID as a parameter and returns both the session keys and a cryptographic proof of ownership. For most users, generating keys directly within the client is recommended. Both the keys and proof must be provided when registering new keys on-chain. Until runtime 2.2.0 is live on your network, use the legacyauthor.rotateKeysRPC and pass0x00as the proof when submittingsetKeys. -
Generate outside node and insert: Using the
author.setKeysRPC call. This flexibility accommodates advanced security setups and should only be used by experienced validator operators. A valid ownership proof is still required when submitting keys on-chain.
See the Key Management guide for more details.
Signing Outside the Client
Section titled “Signing Outside the Client”Polkadot plans to support external signing, allowing session keys to reside in secure environments like Hardware Security Modules (HSMs). However, these modules can sign any payload they receive, potentially enabling an attacker to perform slashable actions.
Secure-Validator Mode
Section titled “Secure-Validator Mode”Polkadot's Secure-Validator mode offers an extra layer of protection through strict filesystem, networking, and process sandboxing. This secure mode is activated by default if the machine meets the following requirements:
-
Linux (x86-64 architecture): Usually Intel or AMD.
-
Enabled
seccomp: This kernel feature facilitates a more secure approach for process management on Linux. Verify by running.Terminal window cat /boot/config-`uname -r` | grep CONFIG_SECCOMP=If
seccompis enabled, you should see output similar to the following:Terminal window CONFIG_SECCOMP=y
Linux Best Practices
Section titled “Linux Best Practices”Follow these best practices to keep your validator secure:
- Use a non-root user for all operations.
- Regularly apply OS security patches.
- Enable and configure a firewall.
- Use key-based SSH authentication; deactivate password-based login.
- Regularly back up data and harden your SSH configuration. Visit this SSH guide for more details.
Validator Best Practices
Section titled “Validator Best Practices”Additional best practices can add an additional layer of security and operational reliability:
- Only run the Polkadot binary, and only listen on the configured p2p port.
- Run on bare-metal machines, as opposed to virtual machines.
- Provisioning of the validator machine should be automated and defined in code which is kept in private version control, reviewed, audited, and tested.
- Generate and provide session keys in a secure way.
- Start Polkadot at boot and restart if stopped for any reason.
- Run Polkadot as a non-root user.
- Establish and maintain an on-call rotation for managing alerts.
- Establish and maintain a clear protocol with actions to perform for each level of each alert with an escalation policy.
Additional Resources
Section titled “Additional Resources”For additional guidance, connect with other validators and the Polkadot engineering team in the Polkadot Validator Lounge on Element.